


Get A Fishing License
- Alabama
- Alaska
- Arizona
- Arkansas
- California
- Colorado
- Connecticut
- Delaware
- Florida
- Georgia
- Hawaii
- Idaho
- Illinois
- Indiana
- Iowa
- Kansas
- Kentucky
- Louisiana
- Maine
- Maryland
- Massachusetts
- Michigan
- Minnesota
- Mississippi
- Missouri
- Montana
- Nebraska
- Nevada
- New Hampshire
- New Jersey
- New Mexico
- New York
- North Carolina
- North Dakota
- Ohio
- Oklahoma
- Oregon
- Pennsylvania
- Rhode Island
- South Carolina
- South Dakota
- Tennessee
- Texas
- Utah
- Vermont
- Virginia
- Washington
- West Virginia
- Wisconsin
- Wyoming
Paddle in Style: A Step-by-Step Guide to Painting Your Kayak
Paint A Kayak
Updated on 5/16/2024
By Abigail Scott
Hi, I'm Abigail 👋 Since embarking on my kayaking and boarding adventures in 2010, I've navigated rivers and lakes across North America and beyond. With over a decade of experience and countless waterways explored, I'm here to help enthusiasts like you embark on unforgettable water adventures!
Learn More about Abigail Scott
On this page
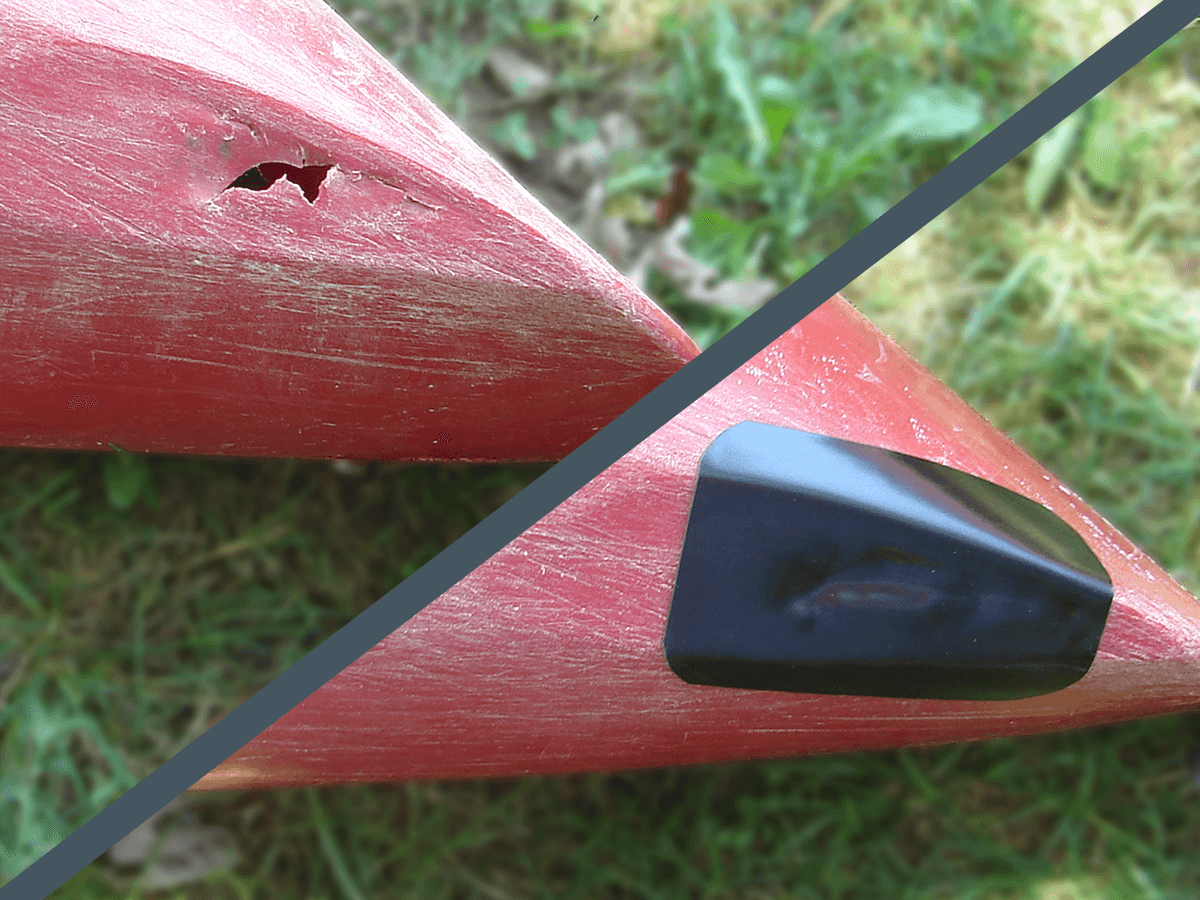
You've come to the right place to give your kayak a makeover, or if someone gave you an old kayak, you want to repaint. I've done a few for myself and my family, and it's simple enough that anyone can paint a kayak, even at home. So, How to paint a kayak?
How To Paint A Kayak
Six steps are required to paint a kayak:
- Remove Your Extra Kayak Components.
- Thoroughly clean your kayak and sand kayak down.
- Paint, Maintenance, And Patience.
- Apply The Clear Coat To Complete The Project.
- Thoroughly rewash kayak while applying Wax.
- Reconstruct Your Kayak's Components.
You are free to start painting your kayak right away, but if you want a guide that will explain each detail clearly, keep reading below, and I guarantee you won't be disappointed!
Painting A Plastic Kayak
Painting a plastic kayak is more accessible than most people believe to paint your kayak; all you need is some knowledge, work, and patience. However, there are a few prerequisites before you can begin, so let's go through them and get you well on your way.
What Will You Require To Begin Painting Your Kayak?
The more meticulously you paint your kayak, the longer it will last and the more aesthetically beautiful the product will be. In addition, safety should always be your number one priority, so be aware of toxic paints and substances. The following are necessary to begin:
- A good mask for painting.
- A few clean pieces of fabric.
- Marine-safe Wax or spray paint with a clear finish.
- Sandpaper Acetone Spray paint is safe for water use or color that works on plastics.
- Water container.
After completing the list of requirements, now is the time to begin painting your kayak.
Step 1: Remove Any Extra Kayak Parts.
Take some time removing any extra accessories or components from your kayak that you do not wish to paint. To avoid paint damage, you don't have to mask or cover them up. Furthermore, you avoid the chance of replacing anything that has been harmed by any compounds utilized.
Step 1: Remove Any Extra Kayak Parts.
By utilizing unusually colored elements that may need repainting, you risk ruining the aesthetic appeal of your kayak. You should also save the pieces you remove in a large container or designated location to avoid losing accessories. Choose an ideal spot for painting your kayak with care. Both paints and spray paints include hazardous substances that may cause significant harm to the human body.
Before you start painting, ensure you have a well-ventilated, dust- and debris-free area and that your kayak is securely resting on a big enough tarp. If you're painting in a compact room, ensure all windows are open, and a ventilation fan provides enough circulation; you don't want airborne particles to ruin your efforts.
Step 2: Thoroughly Clean And Sand Your Kayak.
Before you begin painting your kayak, sand it down with sandpaper. When sanding, be sure to smooth out all the surfaces of the kayak that you want to paint; this will aid in the adhesion of the paint. The grit level varies depending on the application, but 100 to 220 is suitable for kayaking.
You might also use an orbital sander if you like. An orbital sander will perform excellently, removing the correct amount of paint while scuffing the kayak. An orbital sander will make sanding your kayak fast, simple, and painless. Sand the kayak with 120 grit sandpaper, going over it softly yet swiftly.
Step 2: Thoroughly Clean And Sand Your Kayak.
In nail polish, varnish, and stain removers, acetone is a solvent that dissolves or degrades paint or varnish. The products can prevent oils from inhibiting the proper adhesion of paint on your kayak. Before painting, You must well wash the kayak with water and soap or dish detergent before painting kayak. With a dab of acetone, dirt, grime, and other impurities that may hinder the paint's adhesion to the surface may be quickly eliminated.
After sanding and cleaning your kayak, apply a good-quality binding primer, such as Rust-oleum. Binding primer is ubiquitous and works well on metal and plastic, and its unique mix improves paint adhesion to plastic. Consequently, the end effect will be more visually beautiful and last considerably longer.
Allow the primer to dry for a few minutes, and apply the base coat within an hour after the primer. Otherwise, you may get issues with the paint adhering to the plastic.
Step 3: Paint, Care, And Patience.
Ensure that your paint is water-resistant and suitable for plastics (or your particular kayak) since traditional colors may not stick to plastic. Most likely, two coats of paint will be sufficient for your kayak.
Before you begin painting, don't forget to wear your safety mask! When putting several spray paint colors on your kayak, be careful to start with the lightest shade. After applying the more golden hue to the whole kayak, you may proceed with the darker colors to create shapes, stickers, and lettering as you see appropriate. You may always apply a third and final coat of clear paint on the kayak to maintain the color and effort put into painting the kayak. In addition, you may paint a wooden or fiberglass kayak, even painting polyethylene kayak, so long as you use the suitable paint for the kayak material.
Step 3: Paint, Care, And Patience.
To avoid unsightly markings and blemishes, let the kayak dry thoroughly after painting the kayak. Otherwise, you will have to repaint the kayak. After the paint has dried and applied, you must add a transparent coat layer, and Clearcoat will significantly extend the color's durability. If you use your kayak daily, you may want to consider three coats of paint, while weekend warriors may get away with two. People who kayak every other weekend may choose a kayak with a single coat of paint.
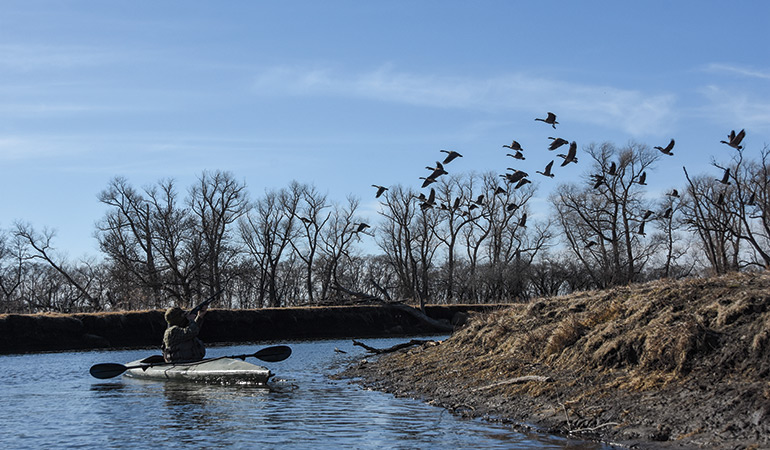
You may be tempted to choose gloss, high gloss, or matte sprays instead of a flat clear coat, but you will be happier if you select this option. If you use your kayak for hunting, you should know that the paint gloss will provide enough shine to frighten away any animal that spots you on the water.
Again, conventional wisdom suggests applying two coats of paint, but the fact is that one will be enough. The number of layers you need for your kayak depends on how often you use the kayak and the weather conditions.
Step 4: For The Last Touches, Apply The Clear Coat.
After you've painted and scorched the kayak, You should apply a clear coat. Again, ensure you obtain a flat coat; matt is okay, but semi-gloss or gloss can frighten off birds, deer, and other animals if you hunt in a kayak.
Otherwise, the clear coat will keep the paint adhered to the kayak's plastic.
Step 5: Thoroughly Rewash The Kayak Before Applying Wax.
Step 5: Thoroughly Rewash The Kayak Before Applying Wax.
Once the paint and clear coat are fully dry, give your kayak a final cleaning with other dishwashing soap and water to enhance cleanliness. After your kayak has dried, you may apply further treatment using marine wax. The sheen will provide additional scratch resistance, but the layer is optional.
Step 6: Reassemble Your Kayak's Components
After washing, sanding, painting, and cleaning, the kayak needs to be reassembled, and the sections you removed at the start need to be restored. You can replace the seat and all your other screws and components.
Paint Kayak
Finally
How to paint a kayak? Remember to sand the kayak with 100 to 220 grit sandpaper before cleaning the kayak with acetone and letting the kayak dry. Apply the bonding primer, allow the kayak to dry for a few minutes, and then apply the base layer of paint. Finally, use the flat clear finish, rewash the kayak, and reinstall all the sections removed in the beginning.
FAQ
Frequently Asked Questions
Should You Paint A Kayak With Spray Paint Or Regular Paint?
Brush painting your boat takes longer since it needs more experience, and your paintbrush cannot cover the same surface area as spray painting. However, since kayaks are considerably smaller than buildings or structures, this may not be a problem. In the same breath, you may realize that using a paintbrush gives you greater accuracy and control over the painting process than a spray can. Brushing is preferable if you want a more elaborate pattern on your kayak. A brush can be used and make patterns, doodles, and color splashes. It takes more paint to spray than to brush. Spray painting may be messy, so work in a broad area, away from other things, and cover any sections you don't want to be painted. You are included (and, in some cases, the dog). In addition, spraying paint may be a messy application technique, so ensure that you have appropriate space, are away from any items, and have covered any unpainted areas. This pertains to you and, in some cases, the dog. As previously said, operate in a well-ventilated area since spray paints may emit many fumes when the paint particles become airborne.
Which Paints Are Safe To Use On A Kayak?
Consider these kayak-appropriate colors if you want to conduct an extensive study before beginning a project.
What Is The Best Type Of Paint For Plastic?
If you intend to use standard spray paint, you must prep the object beforehand. It is preferable to use colors with a formula designed for plastics. Krylon Fusion for Plastic, Valspar Plastic Spray Paint, and Rustoleum Specialty Paint For Plastic Spray are examples of available products.
Is it Possible To Use Acrylic Paint On Plastic?
Plastic may be colored with acrylic paint, which is commonly available. However, selecting the appropriate coloring for the task at hand is essential. Before applying paint, preparing and sealing the surface may be necessary, which is often accomplished by sanding and priming the plastic.
What Can Paints Useful On Wooden Kayaks?
Because of its urethane-modified resin, kayak enamel paint is excellent for wooden kayaks. Polyurethane paint (PU paint) is a durable, long-lasting coating used in industrial and architectural painting systems for steel, concrete, wood, and other surfaces. A polyol resin with an isocyanate hardener or curing agent is a reactive polymer. A polyurethane coating is a liquid material that dries to form a paint-like surface on a substrate. The isocyanates and polyols used to make polyurethane can modify its properties, allowing it to be tailored to specific purposes. Polyurethane paint has a glossy surface and is chemical, water, abrasion, and temperature resistant. It has a long shelf life as well. As a result, it's ideal for both fiberglass and wooden boats.
![Transform Your Kayak with Stunning Wrap Designs [2024]](https://shared-bucket-websites.s3.amazonaws.com/CanYoukayakWrapDesigns-1657647930999)