


Get A Fishing License
- Alabama
- Alaska
- Arizona
- Arkansas
- California
- Colorado
- Connecticut
- Delaware
- Florida
- Georgia
- Hawaii
- Idaho
- Illinois
- Indiana
- Iowa
- Kansas
- Kentucky
- Louisiana
- Maine
- Maryland
- Massachusetts
- Michigan
- Minnesota
- Mississippi
- Missouri
- Montana
- Nebraska
- Nevada
- New Hampshire
- New Jersey
- New Mexico
- New York
- North Carolina
- North Dakota
- Ohio
- Oklahoma
- Oregon
- Pennsylvania
- Rhode Island
- South Carolina
- South Dakota
- Tennessee
- Texas
- Utah
- Vermont
- Virginia
- Washington
- West Virginia
- Wisconsin
- Wyoming
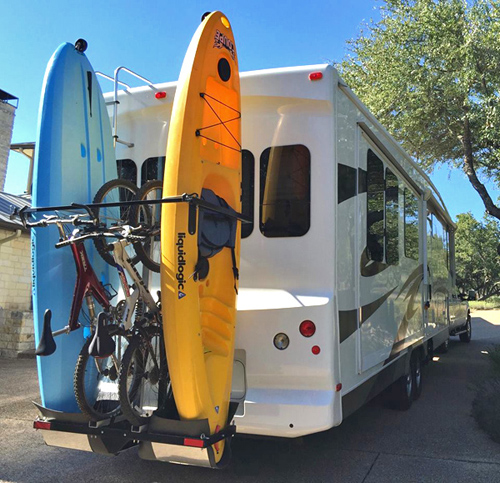
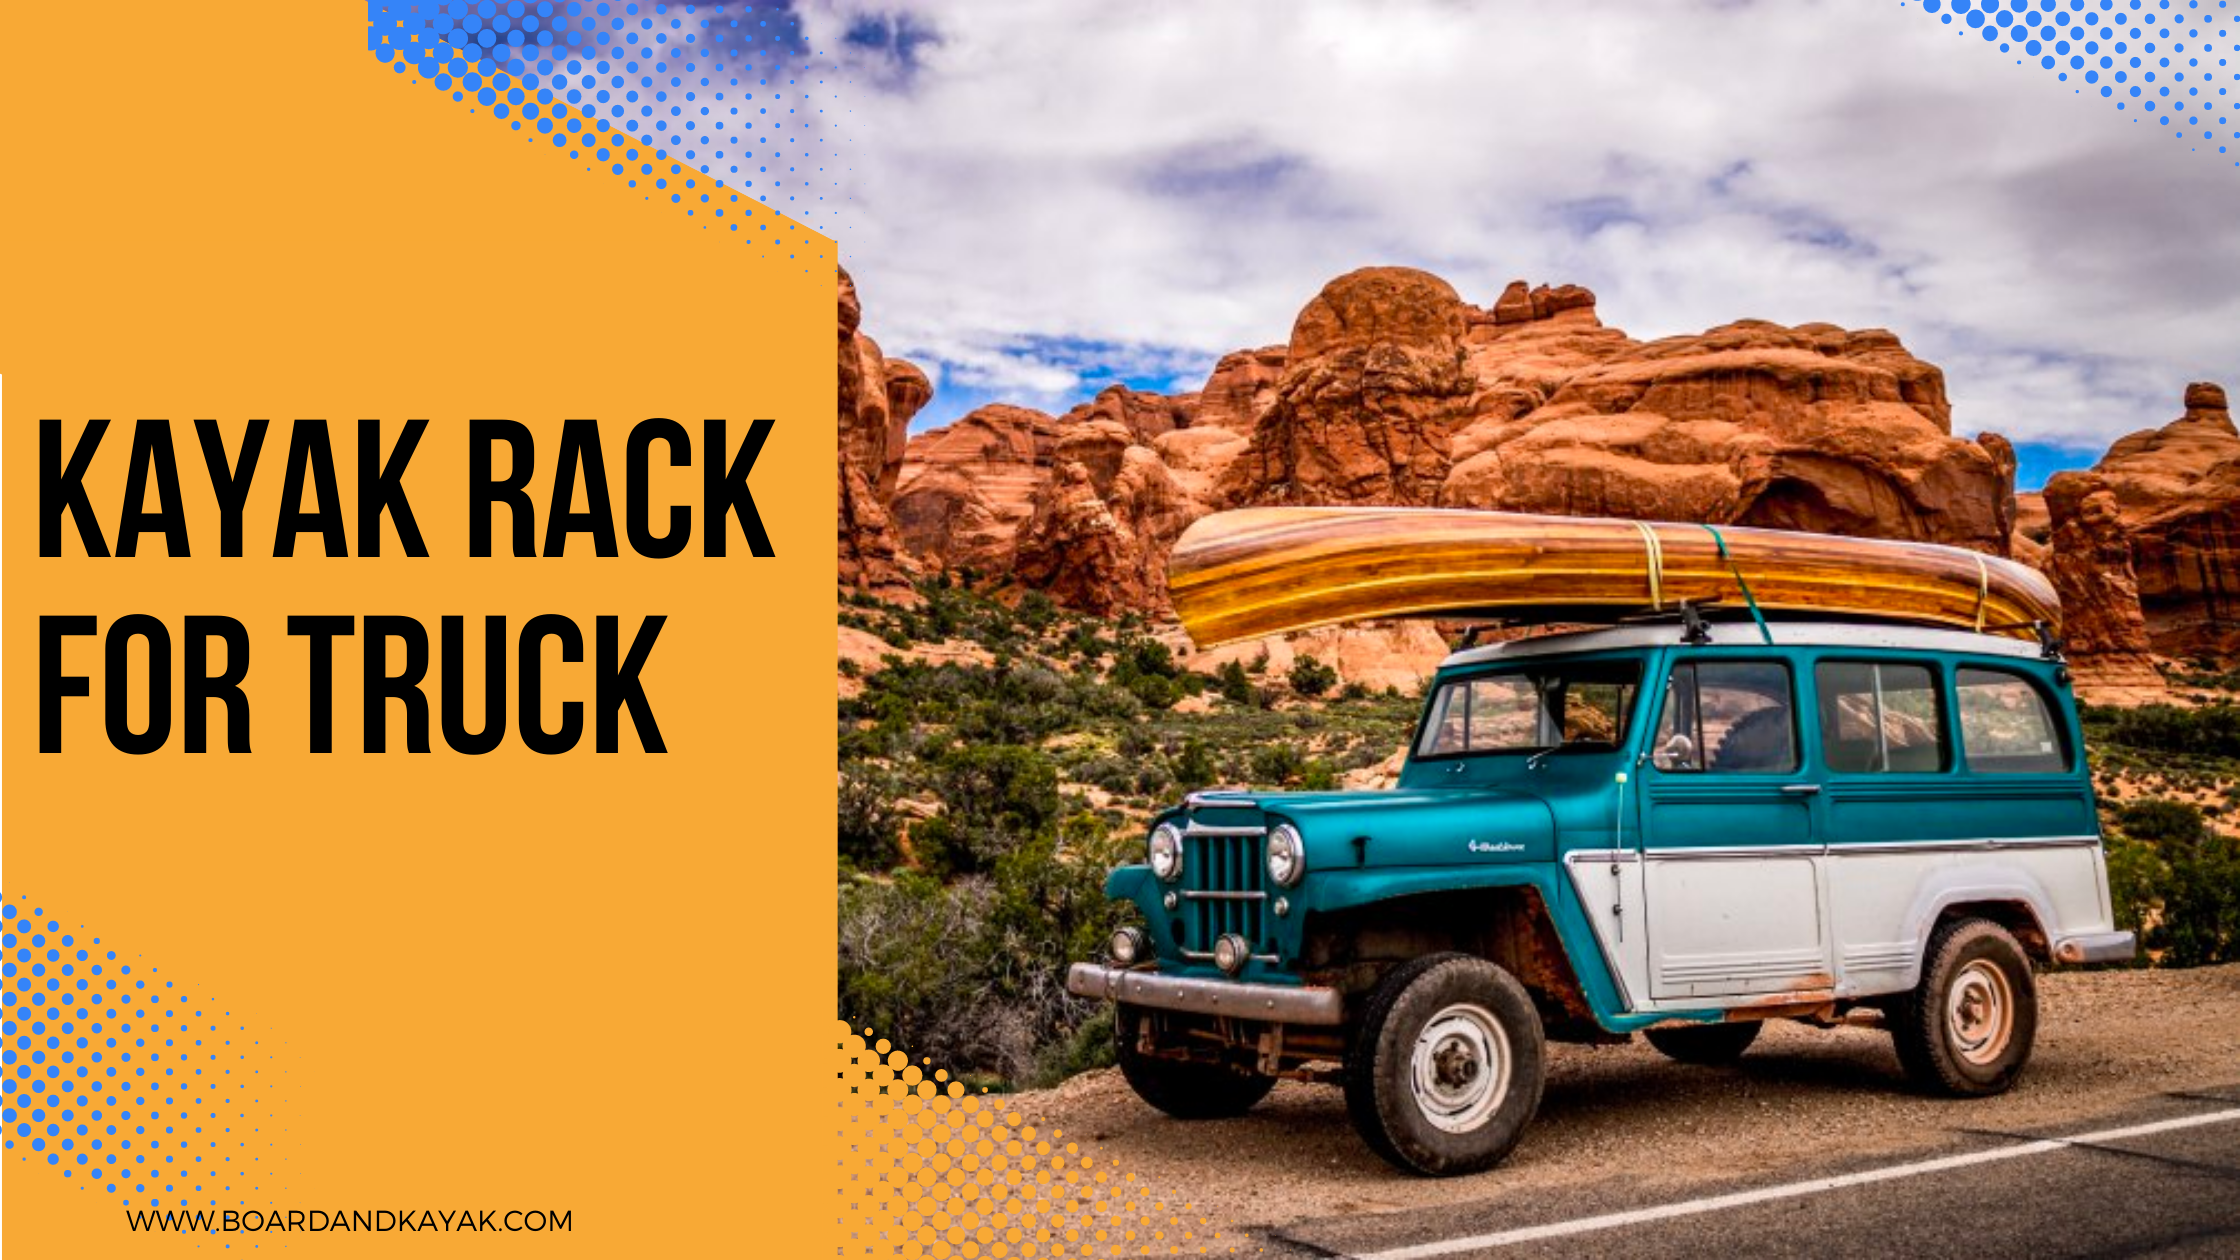
How To Build A Kayak Rack For An RV
How To Build A Kayak Rack For An RV
Updated on 5/8/2024
By Abigail Scott
Hi, I'm Abigail 👋 Since embarking on my kayaking and boarding adventures in 2010, I've navigated rivers and lakes across North America and beyond. With over a decade of experience and countless waterways explored, I'm here to help enthusiasts like you embark on unforgettable water adventures!
Learn More about Abigail Scott
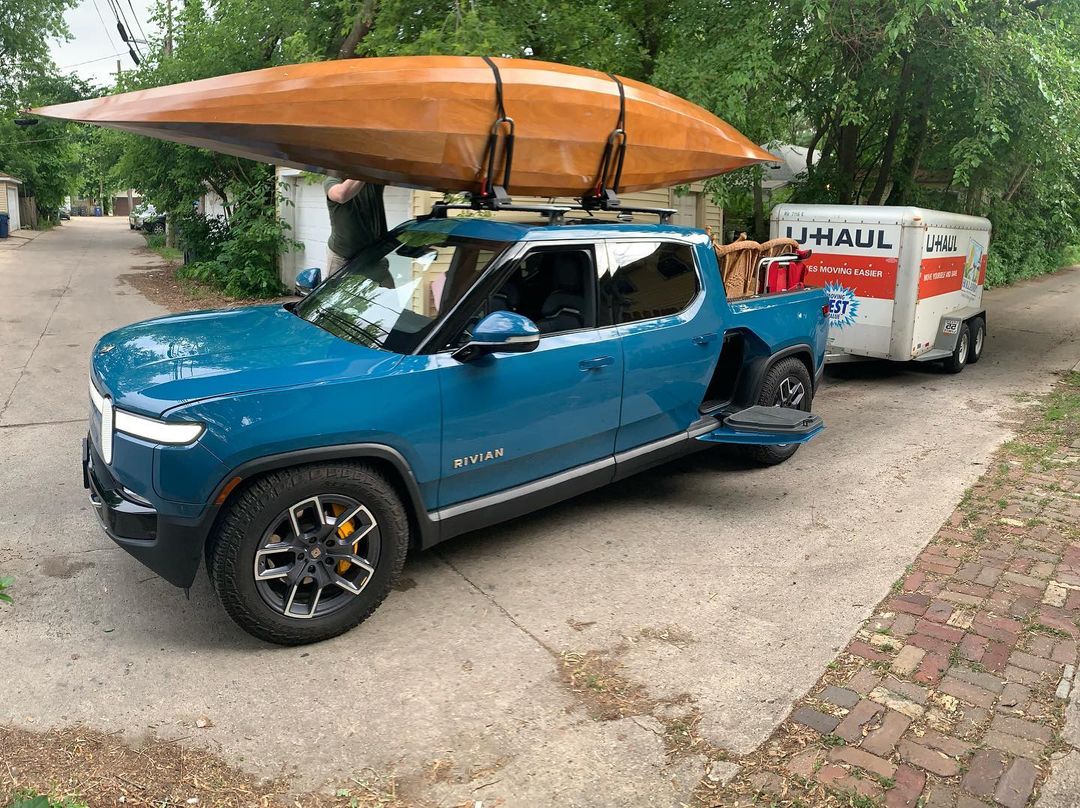
How to build a kayak rack for an RV? If you already own a recreational vehicle (RV) and are considering taking up kayaking as a hobby, you may find that installing a rack for your kayaks is a bit of a pain. Most individuals have trouble figuring out which rack will best suit their requirements and how to start, much alone constructing their racks from scratch.
forest river
To put it more succinctly, it is possible to transport a kayak on the roof of a recreational vehicle. The installation of a kayak rack is the only thing left to complete, and you will be all set. On the other hand, the cost of this solution can be a bit higher than you were expecting. I will walk you through a few different do-it-yourself methods for building a kayak rack for an RV to assist you in saving some money, and we will discuss some of your other options in the following paragraphs.
DIY Kayak Rack For Your RV (Option 1)
The great majority of do-it-yourself camper kayak racks are nothing more than a cargo carrier attached to the vehicle's hitch. Most of them are made to connect directly to your car's tow hitch and have hundreds of pounds capacity, which is enough to carry either one or two kayaks standing up while they are transported.
What You Need
- Cargo carriers that attach to your hitch and come with a waterproof bag for transporting your stuff are called hitch-mounted carriers.
- The ratchet straps come in a total of two different sizes.
- A hitch stabilizer constructed of heavy-duty steel is included with a cargo net that arrives pre-assembled.
What You Need
In addition, you should look for a carrier with a capacity of at least 500 pounds and can carry big things like a kayak or camping gear.
Related Waterproof bag for kayaking
First step: Assemble The Tray
After a tray has been acquired and the associated costs have been settled, assembling the Tray may get underway. In typical circumstances, it will have a length of around 60 inches, a width of about 20 inches, and a height of about 6 inches. After that, you will have to attach it to your RV's hitch so who can pull it behind it.
Second Step: Use Empty Milk Crates
After fastening the milk crates that have been emptied with straps to the foundation of the cargo area, wrap each one with a foam packing sheet to keep it from becoming damaged. You might even be creative by utilizing the tools to cut holes in the Tray of a specified size and then inserting a bucket or some other container into which the kayak ends would drop. That would be an awe-inspiring way to demonstrate your level of ingenuity, and this would be a solution that is not just more complex but also more elegant.
Third Step: Strap Your Kayaks Down
Build a rack that will allow kayaks to be stored in a vertical position in the area at the very top of your car. Who can mount the kayaks much more quickly and easily if you stand them on end? First, use the straps provided to secure the upper portion of the ladder to the top of the cargo tray.
Third Step
Next, use the straps to connect the lower part of the ladder to the back of the vehicle. After some time, the end of the kayak will settle into a stable position below the surface of the Tray.
Things That Should Be Considered As Part Of The Analysis
When deciding whether or not to install a do-it-yourself kayak rack on the rear of your recreational vehicle, you need to consider not only the amount of vertical clearance available but also the total weight of the kayaks. If there is insufficient vertical clearance, the kayak rack cannot support its weight. Since the average weight of a kayak is between 30 and 80 pounds, their weight shouldn't be an issue unless you wish to put a substantial quantity of additional gear on top of the rack simultaneously. It is essential to correctly measure the length of your kayak since the height is directly related to it. To give you an illustration, a twelve-footer may poke its head over the top of the air conditioning unit located on your roof, reducing the amount of room you have available.
Our Overall Review
4.5
This step-by-step instructional guide will show you the proper method to store your kayak once you have finished using it.
Related DIY Kayak Stand
DIY Carrier Rack System (Option 2)
You might have a rack system that is tailored to hold kayaks that are eight feet long and folding bikes that are twenty inches in diameter built just for you. You could, however, scale it up if you have larger bikes and kayaks that are longer than 10 feet, such as kayaks that are 10 feet, by elevating the location of the camper attachment bar and lengthening the bike rack parts. That would be necessary if you had kayaks that are 10 feet. You could quickly scale it up if you have larger bikes and boats longer than 10 feet, such as kayaks that are 10 feet. If you have kayaks that are 10 feet, you could use those.
Things That Are Necessary For You To Do
To implement this strategy and plan, you will need a carrier rack system. The following subsystems are included in this overall system:
- Bumper sleeve
- Bike racks that may be attached to walls using standpipes
- A bar that fastens to the camper's back wall at the rear of the vehicle
- Kayak pads
- Bike rack pads
ster one
Step 1: Bumper Sleeve
Materials
- Angle iron is steel, measuring 2 inches wide by 2 inches tall and extending for 6 feet.
- Long hardwood boards with dimensions of 2 inches by 6 inches and a total length of 6 feet and 4 inches
- ⅜ "x 4" x 7" shackle bolts (2 pieces)
You will require the utilization of the wood boards and the steel angle iron to create your bumper sleeve successfully. You will need glue and bolts to connect it as an "L" to finish the mission successfully. After that, you will need to utilize the shackle bolts to fasten both sides of the bumper sleeve. You should attach it to the camper's frame rather than placing it on the bumper of your RV, as this will provide more stability.
Step 2: Kayak Pads
Materials
- 2" x 12" wood boards
- ¾ "PVC tube
Create the foundation of your boats using the available wood planks as building materials. You should drill a customized hole in the extremity of your kayak pads so that they can accept the extremity of your kayak. In addition to this, make sure that the PVC tubing is securely fastened around the places. Your kayaks will be more secure if you drive your RV while it is working since the RV will function as a support for holding your kayaks while you are going.
Step 2: Kayak Pads
Afterward, affix your kayak pads to your bumper sleeve by gluing them in place, then securing the glued joints with bolts. Cradle it in your arms by extending the length of its back below the bumper until your arms entirely encircle it.
Step 3: Bike Rack Pads
Materials
- 2" x 6" wood boards
- 2 "U-clamp
- 1 "aluminum channel (2 pieces)
A total of four bike rack pads are required, with two for each side of the rack. Because of this, you will also need to ensure that you have two sets of every necessary material. Who should use wood planks for the table's top instead of any other material? After that, use bolts to secure the U-clamp to the surface in the center of the character. Each side of the U-clamp will have an aluminum channel attached to it. Because you want to put it in a vertical configuration, it can support the tire on the back of your bicycle. After that, you will need to glue and screw your bike rack pads onto your bumper sleeve to secure them.
Step 4: Bike Rack Fixtures
Materials
- 2×4 "wood
- 1-½ x 1-½' aluminum L channel
- 2 "U-clamp
- 1 "aluminum channel (2 pieces)
Step 4: Bike Rack Fixtures
In addition, you will need two bike rack fittings, which are pads of the same size and form as the bike racks themselves. Construct the wooden top and bottom portions of each fixture used for the bike rack, then connect it to each side of the aluminum L channel. After that, bolt it to each side of the vertical sides of your bumper sleeve. In the same way, you did with the pads for the bike rack, install the U-clamps with the aluminum channels on either side of the upper half of each fixture. After that, it will be capable of holding the front tire of your bicycle, which will then be orientated in a vertical position once it has been secured. After that, attach it to your bumper sleeve using bolts and glue, then apply it to the bumper using adhesive.
Step 5: Camper Back Wall Attach Bar
Materials
- 1 "a steel angle iron that is six feet in length
- ¾ "PVC pipe (2 pieces)
- Pin sets
- Anchor hold-downs that utilize loops of webbing may be used (3 pieces)
Affix the steel angle iron you bought at the hardware store to the back of your RV vehicle. To finish it, you will need to first place it on the wall, which requires you to drill five holes in the wall to attach it. Next, you will need to make two sets of clearance holes, each with a diameter of 14 inches, for the pin sets you will use to secure your bike rack fixtures. These holes should be drilled using a drill that has a bit size of 14 inches. After that, foam pipe insulations should be attached to each side of the PVC pipe, and who should cover the pipe with the PVC pipe. It will fulfill the role of bumpers for the upper section of your rack, in addition to completing the task at hand. Following that, you will need to attach three anchor loop hold-downs so that other people may connect your kayaks to one another. You may ensure that you won't move while you're paddling by reading some valuable ideas on the essential kayak anchor guide right here, which you can find on this page.
Our Overall Review
4
Related RV kayak rack
Step 6: Kayak Connect-Hold Down Bar
Materials
- ¾ "PVC fittings
- ¾ "200-PSI PVC pipe (2 pieces
- ¾ "EMT steel pipe
- Spring pin
To begin putting it all together, you will need to fasten the 200-PSI PVC pipe to both sides of the EMT steel pipe using the appropriate fasteners. After that, use the required screws to attach the PVC fittings to each side of the 200-PSI PVC pipe. On one side of its construction, a detachable connector or pin should be connected so that who may use it on the other side, which should have the other end secured. There should be a tight end on the other side of its construction. The next step is to put it on the point of your RV that is in the highest position possible. The purpose of this device is to secure both of your kayaks together so that you cannot separate them.
Essential Factors That Who Should Take Into Consideration
Most camper bumpers are not built to withstand substantial amounts of weight since they were not intended to do so. Because of this, they are utilizing this method to construct the camper would be fraught with risk if the bumper were not made more robust by adding an additional channel through the welding process. Additionally, the trailer would be responsible for bearing the vast majority of the weight that the camper structure is expected to withstand when it is built utilizing this method.
step6
Bonus: Carry Kayaks On Your RV’s Roof
It is feasible to transport your kayak on top of your RV without using a roof rack, even though most professionals recommend using a roof rack for this purpose. Even if a frame you build yourself still has the advantage of having the lowest overall cost, this option comes in second place. To do this activity, all you will need are pool noodles.
Step 1: Measurement Is Key
When making this comparison, you need to ensure that you take into account the length of the roof on your RV. Take some measurements of your kayak's length.
Step 2: Attach The Pool Noodles
step two
After you have finished taking the measurement, you should arrange the noodles in such a way that they are parallel to the ceiling at both of the room's ends. It would help if you stored the pool noodles in the exact location as a conventional rack since they may serve the same function. If this is the case, you should put the pool noodles in the precise place as the rack.
Step 3: Place Your Kayak
The kayak may be kept steady by positioning it on the pool noodles and securing the ratchet straps at either end of the vessel. It would help if you used as many pool noodles as possible to stop your kayak from flying off the roof of your car in solid gusts of wind while traveling at high speeds; what may prevent this by using as many pool noodles as possible. Put another way; the optimal situation would involve an increased quantity of pool noodles.
FAQs
How Much Money Is Needed To Build Kayak Racks?
How Much Money Is Needed To Build Kayak Racks?
There are various approaches you may use when building a vertical kayak rack, from which you can pick the one that works best for you. Therefore, the amount of money you could have to spend to build one will be determined by the design you desire and the materials you want to use in the construction of it. On the other hand, if you go with one of the options that I have provided, you might not spend more than two hundred fifty to three hundred dollars, which is a significant saving compared to the amount of money it would cost you to buy camper kayak racks from a store.
Is It Good To Mount Your RV Racks On The Roof?
Using a rack fastened to the roof of your recreational vehicle (RV) is one of the most common and commonplace solutions available to you when transferring your kayak into or out of your RV. You may very easily add racks to travel trailers and recreational vehicles (RVs), and the procedure of attaching the shelves can be performed by the owner of the car or trailer. And from the other hand, it'd be ideal if you tied it correctly and tightly so that your kayak stays in place, particularly while driving at high speeds on congested routes like highways or motorways. This will ensure that your kayak does not move around.
Aside from that, there are many more uses than you may find for a roof rack on a recreational vehicle. You can utilize it to transport your kayak, in addition to the other equipment you want for camping, and it can accommodate all of it. Because of how it is made, it makes it easier to move heavy items such as enormous bags and containers of water.
Is It Possible To Carry Two Kayaks On Your RV?
fqas
In response to the topic of whether or not you will be able to move both of your kayaks to your RV, the answer is that you will be able to do so. To do this task, you will need a rack capable of storing two or more kayaks. If you want to bring more than two kayaks on your RV trip, you should choose kayaks that are more compact and lighter in weight than the others. In addition, kayak trailers are an excellent choice for transporting two or more kayaks simultaneously.
You have several options for transporting your kayak, one of which is taking it inside your RV. For example, one of the rooms in your RV will have sufficient space to accommodate a kayak that is 10 feet in length without compromising on comfort. If you put them somewhere safe and secure with the help of a ratchet strap, you shouldn't run into any issues!
Wrapping Up
Wrapping Up
How to build a kayak rack for an RV? When building kayak racks, you have total freedom to choose the amount of sophistication you want to implement. There is no right or wrong answer. You may modify the baggage rack to better satisfy your needs by either welding uprights, overhangs, and other features onto it or by tying straps to the rear ladder of your recreational vehicle. Both of these options are available to you. On the other hand, if you have an RV with a high enough roof, you might be able to transfer your kayaks and other containers by driving with them atop the vehicle.
![Toyota Kayak Transport: Best Prius Racks [2024]](https://shared-bucket-websites.s3.amazonaws.com/KayakRacksforToyotaPriusWhichAretheBest-1652294571691)
![9 Highly Recommended Kayak Racks For Cars [New 2024]](https://shared-bucket-websites.s3.amazonaws.com/KayakRackForCa-1657886988190)